RDP Proxy
The RDP Proxy functionality is provided as part of the Citrix Gateway. In a typical deployment, the RDP client runs on a remote user’s machine. The Citrix Gateway appliance is deployed within the DMZ, and the RDP server farm is in the internal corporate network.
The remote user;
- connects to the Citrix Gateway public IP address
- establishes an SSL VPN connection
- authenticates
- accesses the remote desktops through the Citrix Gateway appliance
The RDP-proxy feature is supported in clientless VPN and ICA Proxy modes.
Note:
Citrix Gateway does not support Remote Desktop Session Host (RDSH), Remote App, RDS multiuser, RDP sessions, or RDP apps.
The following RDP Proxy features provide access to a remote desktop farm through the Citrix Gateway.
-
Secure RDP traffic through clientless VPN or ICA Proxy mode (without Full Tunnel).
-
SSO (single sign-on) to RDP servers through Citrix Gateway. Also provides an option to disable SSO if needed.
-
Enforcement (SmartAccess) feature, where the Citrix ADC administrators can disable certain RDP capabilities through the Citrix Gateway configuration.
-
Single/Stateless(Dual) Gateway solution for all needs (VPN/ICA/RDP/Citrix Endpoint Management).
-
Compatibility with native Windows MSTSC client for RDP without the need for any custom clients.
-
Use of existing Microsoft-provided RDP client on MACOSX, iOS, and Android.
The following figure depicts an overview of the deployment:
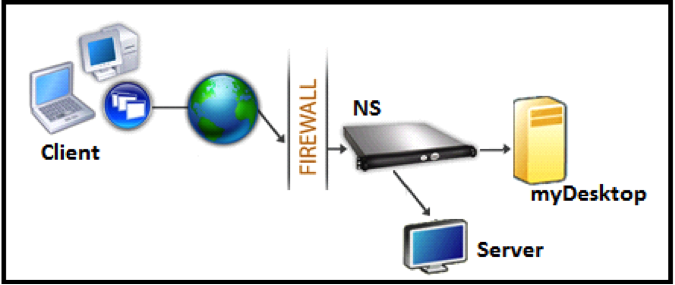
Deployment through clientless VPN
In this mode the RDP links are published on the Gateway home page or portal, as bookmarks, through the add vpn url configuration or through an external portal. The user can click these links to get access to the Remote Desktop.
Deployment through ICA Proxy
In this mode a custom home page is configured on the Gateway VIP by using the wihome parameter. This home page can be customized with the list of Remote desktop resources that the user is allowed to access. This custom page can be hosted on Citrix ADC, or if external, it can be an iFrame in the existing Gateway portal page.
In either mode, after the user clicks the provisioned RDP link or icon, an HTTPS request for the corresponding resource arrives at the Citrix Gateway. The Gateway generates the RDP file content for the requested connection and pushes it to the client. The native RDP client is invoked, and it connects to an RDP listener on Gateway. Gateway does SSO to the RDP server by supporting enforcement (SmartAccess). The gateway blocks client access to certain RDP features, based on the Citrix ADC configuration, and then it proxies the RDP traffic between the RDP client and the server.
Enforcement details
The Citrix ADC administrator can configure certain RDP capabilities through the Citrix Gateway configuration. Citrix Gateway provides the “RDP enforcement” feature for important RDP parameters. Citrix ADC ensures that the client cannot enable blocked parameters. If the blocked parameters are enabled, the RDP enforcement feature supersedes the client-enabled parameters, and they are not honored.
Important: Enforcement feature is applicable only if SSO is enabled.
Supported RDP parameters for enforcement
Enforcement for following redirection parameters is supported. These parameters are configurable as part of an RDP client profile.
-
Redirection of clipboard
-
Redirection of printers
-
Redirection of disk drives
-
Redirection of COM ports
-
Redirection of PNP devices
Connection flow
Connection flow can be divided into two steps:
- RDP resource enumeration and RDP file download.
- RDP connection launch.
Based on the preceding connection flow, there are two deployment solutions:
-
Stateless (Dual) gateway solution - the RDP resource enumeration and RDP file download happens through the authenticator gateway but RDP connection launch happens through the RDP Listener gateway.
-
Single gateway solution - the RDP resource enumeration, RDP file download, and RDP connection launch happen through the same gateway.
Stateless (dual) gateway compatibility
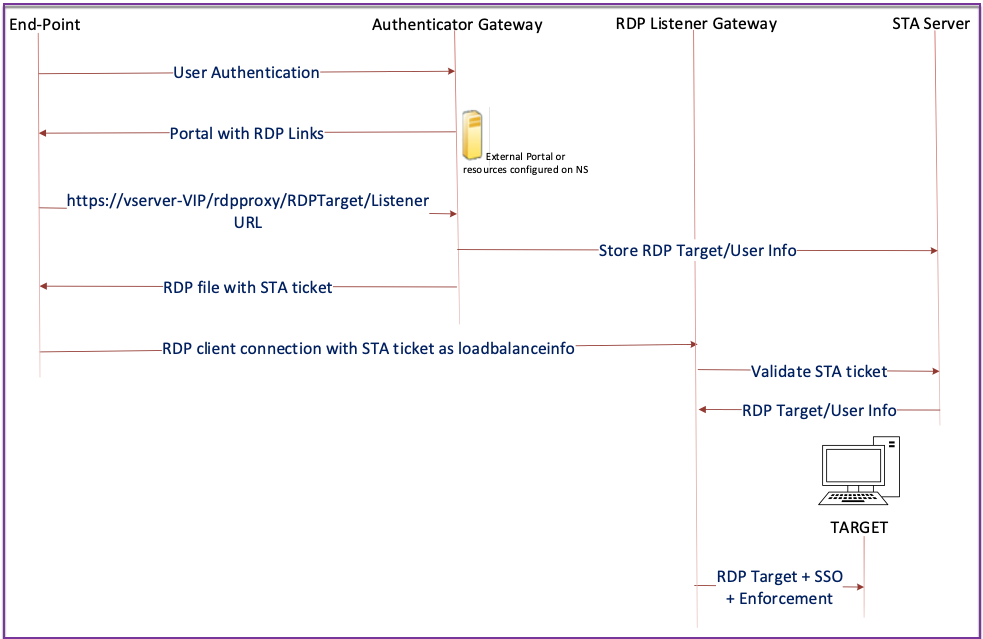
The following figure depicts the deployment:
-
A User connects to the Authenticator Gateway VIP and provides the credentials.
-
After a successful login to the gateway, the user is redirected to the home page or external portal, which enumerates the remote desktop resources that the user can access.
-
Once the user selects an RDP resource, the Authenticator Gateway VIP receives the request in the format
https://vserver-vip/rdpproxy/rdptarget/listenerindicating the published resource that the user clicked. This request has the information about the IP address and port of the RDP server that the user has selected. -
The Authenticator Gateway processes the /rdpproxy/ request. Because the user is already authenticated, this request comes with a valid Gateway cookie.
-
The
RDPTargetandRDPUserinformation is stored on the STA server, and an STA Ticket is generated. The information stored on the STA server is encrypted by using the configured pre-shared key. The Authenticator Gateway uses one of the STA servers that is configured on the gateway virtual server. -
The ‘Listener’ info obtained in the /rdpproxy/ request is put into the
.rdp fileas the “fulladdress,” and the STA ticket (pre-pended with the STA AuthID) is put into the.rdp fileas the “loadbalanceinfo.” -
The
.rdp fileis sent back to the client end-point. -
The native RDP client launches and connects to the
RDPListener Gateway. It sends the STA ticket in the initial packet.The
RDPListenerGateway validates the STA ticket and obtains theRDPTargetandRDPUserinformation. The STA server to be used is retrieved by using the ‘AuthID’ present in theloadbalanceinfo. -
A gateway session is created for storing authorization/auditing policies. If a session exists for the user, it is reused.
-
The
RDPListenerGateway connects to theRDPTargetand single signs on using CREDSSP.
Important:
- For stateless RDP proxy, the STA Server validates the STA ticket, sent by the RDP client, to obtain the
RDPTarget/RDPUserinformation. You must bind the STA server in addition to the VPN virtual server.
Single gateway compatibility
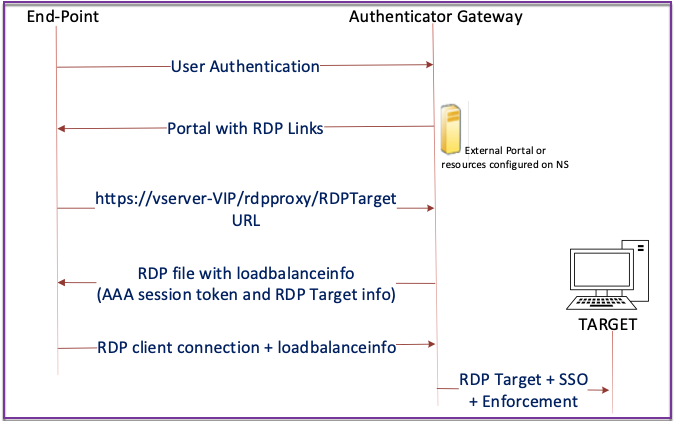
The following figure depicts the deployment:
Important:
In the case of a single gateway deployment, the STA server is not required. The authenticator gateway encodes the
RDPTargetand the Citrix authentication, authorization, and auditing session cookie securely and sends them as theloadbalanceinfoin the.rdp file. When the RDP Client sends this token in the initial packet, the authenticator gateway decodes theRDPTargetinformation, looks up the session, and connects to theRDPTarget.
Support for single listener
-
Single Listener for Both RDP and SSL Traffic.
-
The RDP file download and RDP traffic can be handled through the same 2 tuple (that is, IP and Port) on the Citrix ADC appliance.
License requirements for RDP Proxy
Premium edition, Advanced edition
Note:
RDP Proxy function is not available to customers who have only a Gateway platform license or only the Standard edition.
You can use the following command to enable RDP proxy.
enable feature rdpProxy
<!--NeedCopy-->
Bookmark
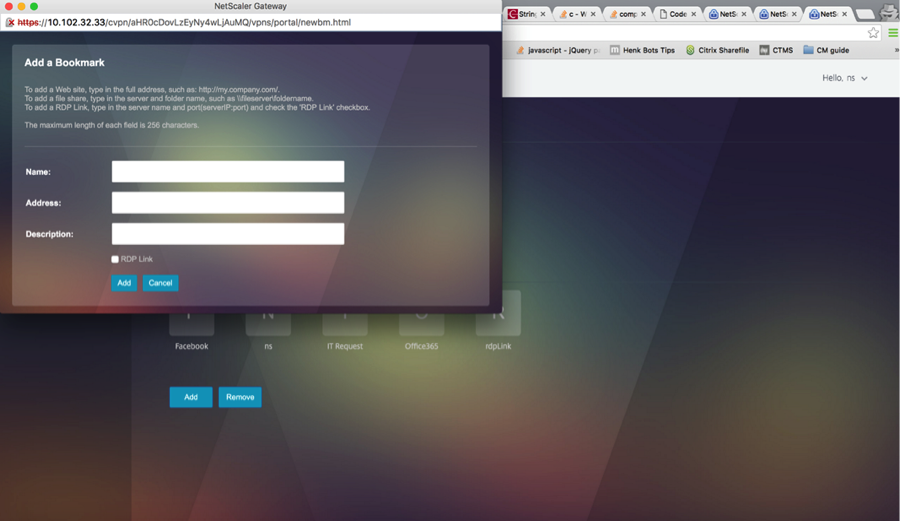
RDP link generation through Portal. Instead of configuring the RDP links for the user or publishing the RDP links through an external portal, you can give users an option to generate their own URLs by providing targerIP:Port. For stateless RDP-proxy deployment, the administrator can include RDP listener information in FQDN: Port format as part of the RDP Client Profile. This is done under the rdpListener option. This configuration is used for the RDP link generation through the portal in Dual Gateway mode.
Create bookmarks
-
Create bookmarks on the portal page to access the RDP resources: (The actualURL starts with
rdp://). -
Add VPN url
<urlName> <linkName> <actualURL>- The URL must be in the following format:
rdp://<TargetIP:Port>. -
For Stateless RDP proxy mode, The URL must be in the following format:
rdp://<TargetIP:Port>/<ListenerIP:Port> - The URL is published on the portal in the format:
https://<VPN-VIP>/rdpproxy/<TargetIP:Port>https://<VPN-VIP>/rdpproxy/<TargetIP:Port>/<ListenerIP:Port>
- The URL must be in the following format:
-
Bind the bookmarks to the user, or group, or the VPN virtual server, or VPN global.
Features and modes to be enabled for RDP Proxy
-  enable ns feature ssl

-  enable ns feature sslvpn

-  enable ns feature rdpproxy

-  enable mode usnip
<!--NeedCopy-->
RDP Proxy high-level configuration steps
The following high-level steps involved in the stateless RDP proxy configuration.
- Create an RDP server profile
- Create an RDP client profile
- Create and bind a virtual server
- Create a bookmark
- Create or edit a session profile or policy
- Bind a bookmark
Configure a client profile
Configure the client profile on the authenticator gateway. The following is a sample configuration:
add rdpClient profile <name> [-addUserNameInRdpFile ( YES | NO )] [-audioCaptureMode ( ENABLE | DISABLE )] [-keyboardHook <keyboardHook>] [-multiMonitorSupport ( ENABLE | DISABLE )] [-psk <string>] [-rdpCookieValidity <positive_integer>] [-rdpCustomParams <string>] [-rdpFileName <string>] [-rdpHost <optional FQDN that will be put in the RDP file as ‘fulladdress>] [-rdpUrlOverride ( ENABLE | DISABLE )] [-redirectClipboard ( ENABLE | DISABLE )] [-redirectComPorts ( ENABLE | DISABLE )] [-redirectDrives ( ENABLE | DISABLE )] [-redirectPnpDevices ( ENABLE | DISABLE )] [-redirectPrinters ( ENABLE | DISABLE )] [-videoPlaybackMode ( ENABLE | DISABLE )]
<!--NeedCopy-->
Associate the RDP client profile with the VPN virtual server.
This can be done either by configuring a sessionAction+sessionPolicy or by setting the global VPN parameter.
Example:
add vpn sessionaction <actname> -rdpClientprofile <rdpprofilename>

add vpn sessionpolicy <polname> NS_TRUE <actname>

bind vpn vserver <vservername> -policy <polname> -priority <prioritynumber>
<!--NeedCopy-->
OR
set vpn parameter –rdpClientprofile <name>
<!--NeedCopy-->
Configure a server profile
Configure the server profile on the listener gateway.
add rdp ServerProfile <profilename> -rdpIP <IPV4 address of the RDP listener> -rdpPort <port for terminating RDP client connections> -psk <key to decrypt RDPTarget/RDPUser information, needed while using STA>`
<!--NeedCopy-->
The rdp ServerProfile must be configured on the VPN virtual server.
add vpn vserver v1 SSL <publicIP> <portforterminatingvpnconnections> -rdpServerProfile <rdpServer Profile>`
<!--NeedCopy-->

RDP Proxy configuration by using the CLI
The following is a sample RDP Proxy configuration by using the CLI.
-
Add the VPN URL for the user with the target information.
add aaa user Administrator –password freebsd123$%^ add vpn url rdp RdpLink rdp://rdpserverinfo add dns addrec rdpserverinfo 10.102.147.132 bind aaa user Administrator –urlName rdp <!--NeedCopy--> -
Configure RDP client and server profile for the VPN connection.
add rdp clientprofile p1 –psk citrix -redirectClipboard ENABLE add rdp serverprofile p1 -rdpIP 10.102.147.134 -psk citrix add vpn vserver mygateway SSL 10.102.147.134 443 –rdpserverprofile p1 set vpn parameter -clientlessVpnMode ON -defaultAuthorizationAction ALLOW -rdpClientProfileName p1 add ssl certKey gatewaykey -cert rdp_rootcert.pem -key rdp_rootkey bind ssl vserver mygateway -certkeyName gatewaykey <!--NeedCopy--> -
ADD SNIP for connection from Citrix ADC to target.
 add ns ip 10.102.147.135  255.255.255.0 –type SNIP
 <!--NeedCopy-->
RDP proxy configuration by using the GUI
-
Navigate to Citrix Gateway > Policies, right-click RDP, and click Enable Feature.
-
Click RDP on the navigation pane. On the right, select the Client Profiles tab and click Add.
-
Enter a name for the client profile a name and configure it.
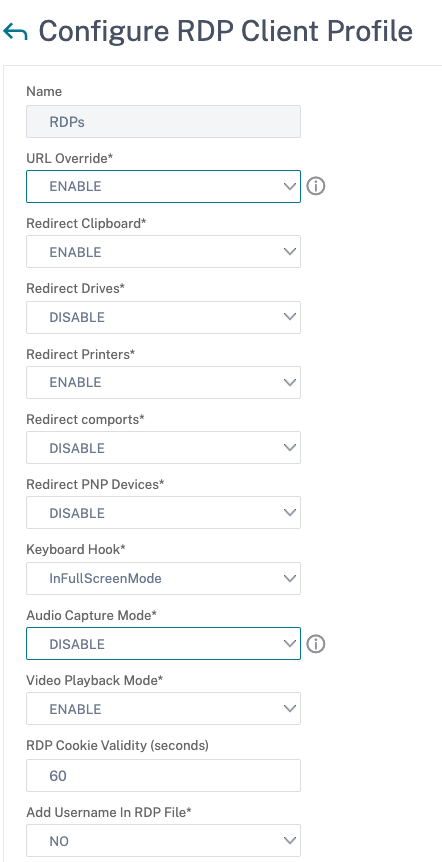
-
In the RDP Host field, enter the FQDN that resolves to the RDP Proxy listener, which is typically the same FQDN as the Citrix Gateway appliance’s FDQN.
-
In Pre Shared Key, enter a password and click OK.
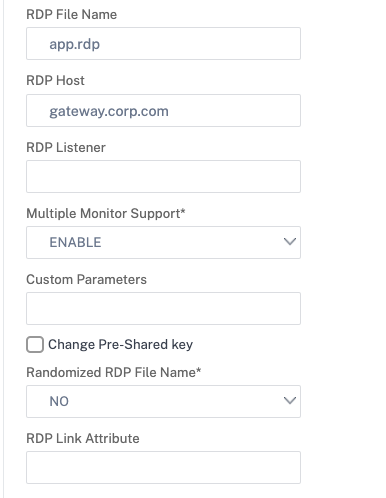
-
Enter the server profile a name.
-
Enter the IP address of the gateway virtual server you’re going to bind this profile.
-
Enter the same preshared key you configured for the RDP client profile. Click Create.
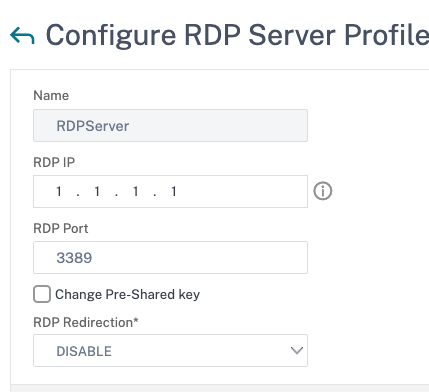
-
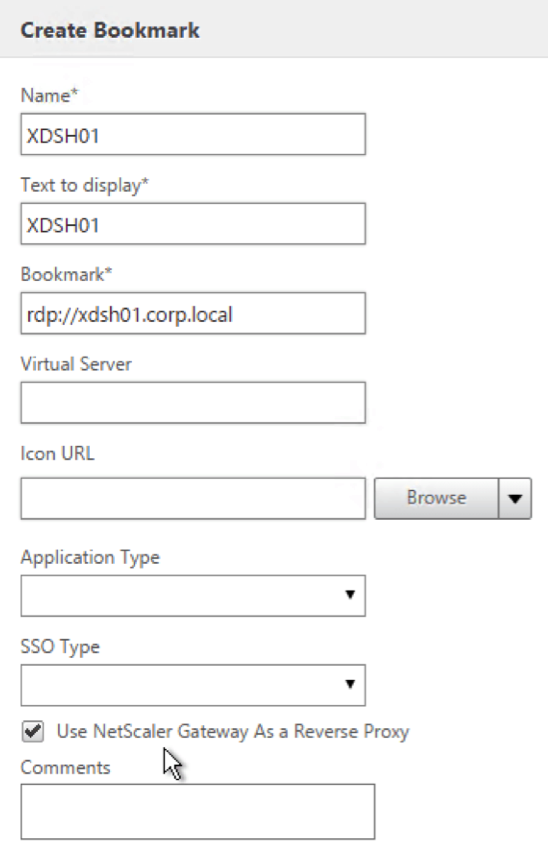
If you want to add RDP bookmarks on the Clientless Access portal page, on the left, expand Citrix Gateway, expand Resources, and click Bookmarks.
-
On the right, click Add.
-
Give the Bookmark a name.
-
For the URL, enter rdp://MyRDPServer using IP or DNS.
-
Select Use Citrix Gateway As a Reverse Proxy and click Create.
-
Create bookmarks as per your requirement.
-
Create or edit a session profile. Navigate to Citrix Gateway > Policies > Session.
-
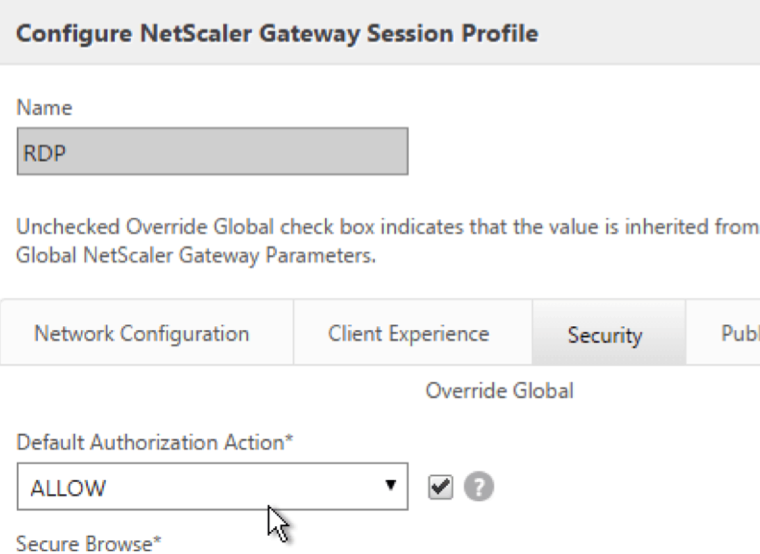
On the Security tab, set Default Authorization Action to ALLOW. Or you can use authorization policies to control access.
-
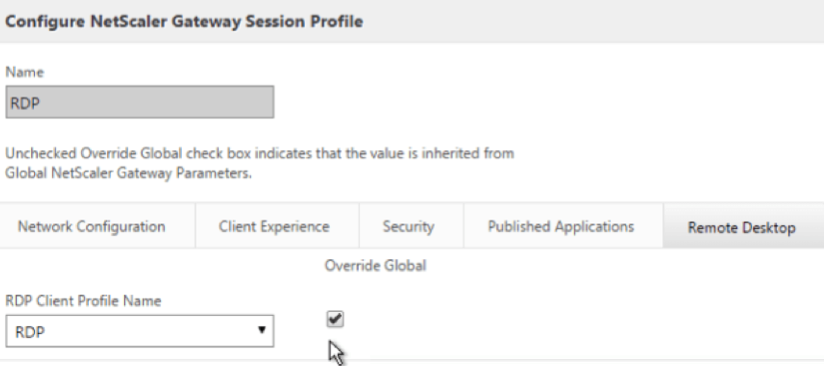
On the Remote Desktop tab, select the RDP client profile you created earlier.
-
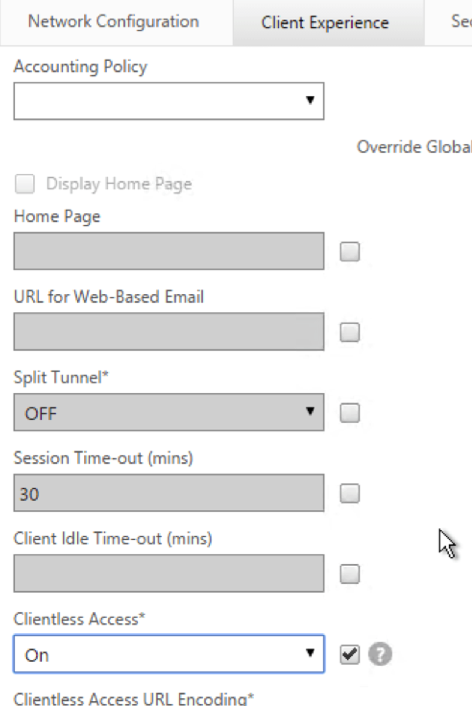
If you want to use bookmarks, on the Client Experience tab, set Clientless Access to On.
-
On the Published Applications tab, make sure that ICA Proxy is OFF.

-
Modify or create your gateway virtual server.
-
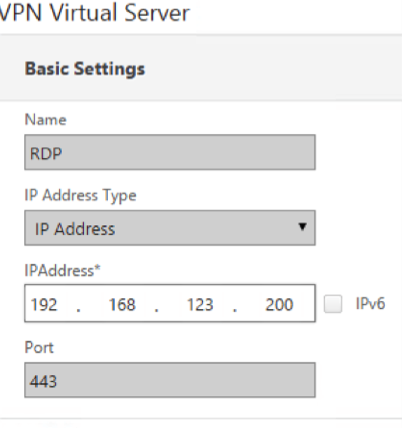
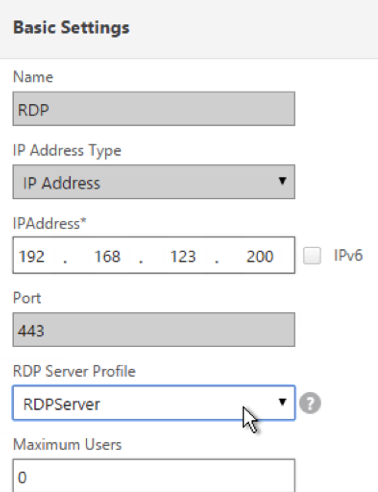
In the Basic Settings section, click More.
-
Use the RDP server profile list to select the RDP server profile you created earlier.
-
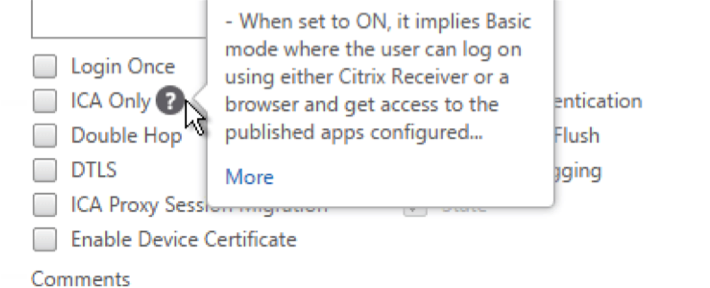
Scroll down. Make sure that ICA Only is not checked.
-
Bind a certificate.
-
Bind authentication policies.
-
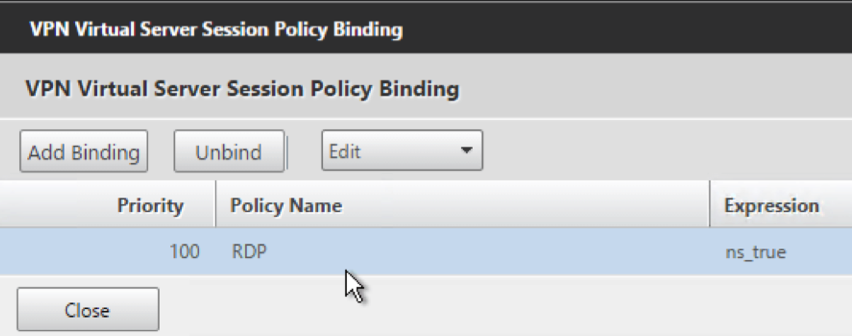
Bind the session policy/profile that has the RDP client profile configured.
-
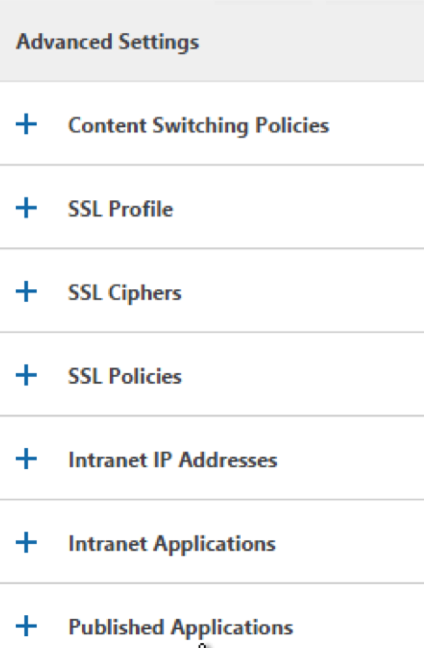
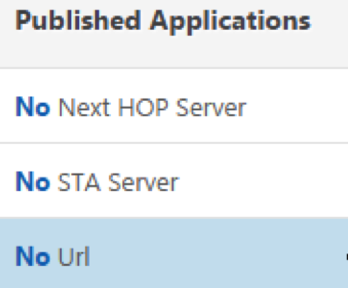
You can bind bookmarks to either the Citrix Gateway virtual server or to an authentication, authorization, and auditing group. To bind to the Citrix Gateway virtual server, on the right, in the Advanced Settings section, click Published Applications.
-
On the left, in the Published Applications section, click No Url.
-
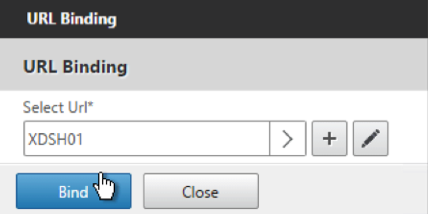
Bind your bookmarks.
-
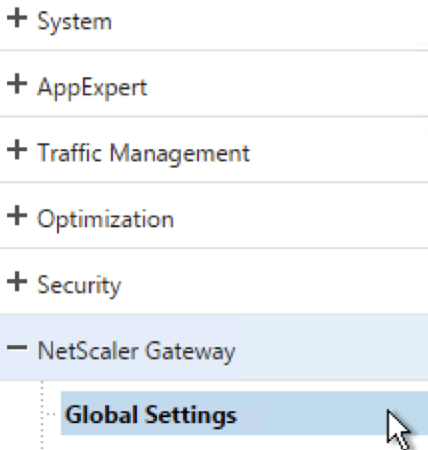
Because ICA Only is not specified for this Citrix Gateway virtual server, make sure that your Citrix Gateway Universal licenses are configured correctly. On the left, expand Citrix Gateway and click Global Settings.
-
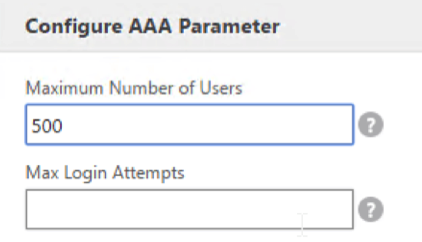
On the right, click Change authentication AAA settings.

-
Change the Maximum Number of Users to your licensed limit.
-
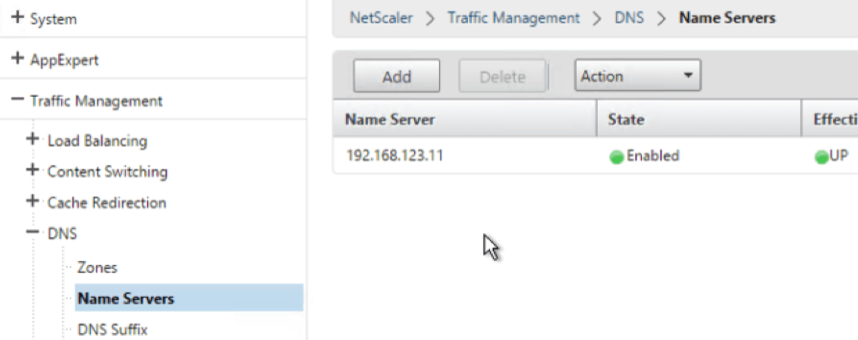
If you want to connect to RDP servers by using DNS, make sure that DNS servers are configured on the appliance (Traffic Management > DNS > Name Servers).
-
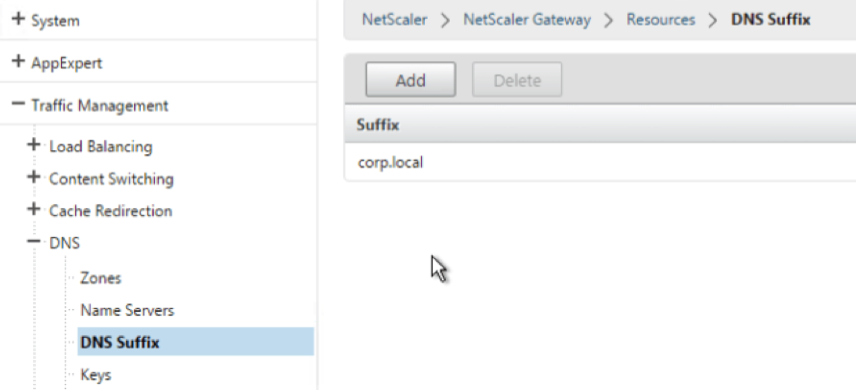
If you want to use the short names instead of FQDNs, add a DNS Suffix (Traffic Management > DNS > DNS Suffix).
-
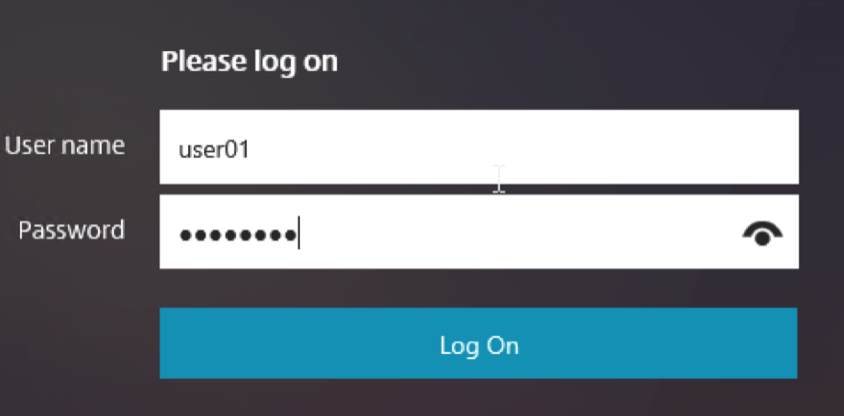
Connect to your gateway and log on.
-
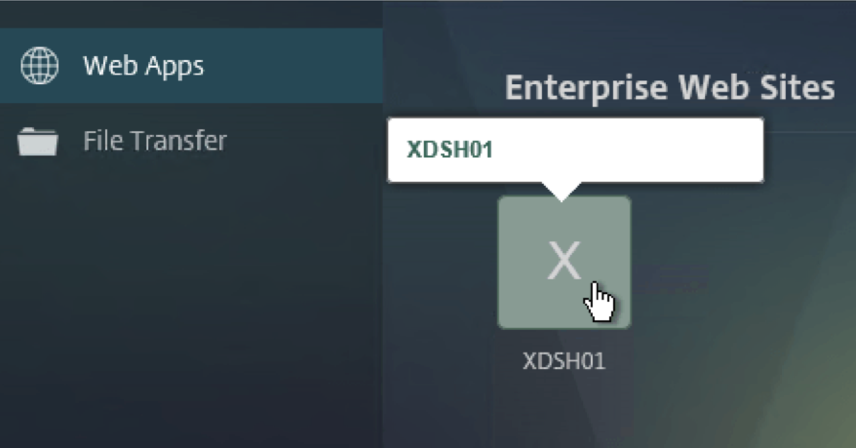
If you configured Bookmarks, click the Bookmark.
-
You can change the address bar to /rdpproxy/MyRDPServer. You can enter an IP address (for example rdpproxy/192.168.1.50) or DNS name (/rdpproxy/myserver).

-
Open the downloaded
.rdp file.
-
You can view the currently connected users by going to Citrix Gateway Policies > RDP. On the right is the Connections tab.

Option to disable SSO
The SSO (single sign-on) feature with RDP proxy can be disabled by configuring Citrix ADC traffic policies so the user is always prompted for credentials. When SSO is disabled, RDP enforcement (SmartAccess) doesn’t work.
Example:
add vpn trafficaction <TrafficActionName> HTTP -SSO OFF
<!--NeedCopy-->
Traffic policy can be configured as per the requirement, the following are two examples:
-
To disable SSO for all the traffic:
add vpn trafficpolicy <TrafficPolicyName> "url contains rdpproxy" <TrafficActionName> <!--NeedCopy--> -
To disable SSO based on Source/Destination IP/FQDN
 add vpn trafficPolicy <TrafficPolicyName>  "HTTP.REQ.URL.CONTAINS(\"rdpproxy\") && CLIENT.IP.SRC.EQ(<IP>)" <TrafficActionName>
 bind vpnvserver rdp -policy <TrafficPolicyName> -priority 10
 <!--NeedCopy-->
In this article
- Deployment through clientless VPN
- Deployment through ICA Proxy
- Enforcement details
- Stateless (dual) gateway compatibility
- Single gateway compatibility
- Support for single listener
- License requirements for RDP Proxy
- Bookmark
- RDP Proxy high-level configuration steps
- RDP Proxy configuration by using the CLI
- RDP proxy configuration by using the GUI
- Option to disable SSO